Wednesday, December 1, 2010

One Boy One Girl Boutique - Cyber Week Sale

Enjoy 15% off your purchase from
OneBoyOneGirlBoutique.com

and
OneBoyOneGirl on etsy
by using coupon code: HOLIDAY2010
sale dates: November 30 - December 7, 2010

In pur Etsy shop you will find over 70 ready to ship items including
Button Pony O's, Rings, Wallets and Aprons

hk knit 78 peacering summer song wallet mommymeFM_400

New custom items available on our Website and Etsy
include Headbands, New Bling Shirts and Sparkle Leggings

all that jazz headband star headband Bling custom name double line dance leggings

Stop by and Take advantage of this special savings
http://oneboyonegirlboutique.com
http://oneboyonegirl.etsy.com

*December 12th is the last day Custom orders will be accepted

~Patricia

Friday, October 15, 2010

Chicken with Bumblefoot - warning not for the squeamish

What the heck is wrong with my chickens foot?! Is she growing a new toe, why is she limping, hmm she's holding her foot up, Why?

I spend time with my chickens each day but I obviously don't pay attention to their feet (lesson learned). All the girls seem happy and healthy but I had no idea something was festering on the bottom of Dragon's foot.

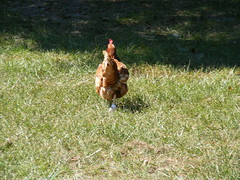
Dragon is a year and half old Red Star hen.
A few days ago I was asking my self the very questions above.
Upon close inspection of her foot I knew something was wrong but what and how do I fix it without spending a fortune taking her to a vet.

Unfortunately I did not take a picture of her foot, I really wish I had because I know it would be helpful to other backyard chicken friends.

Here's what I saw:
Dragon had a large scab like abscess on the top of her foot and her foot was swollen.
On the bottom of the foot was the source of her discomfort, a 3mm sized black flat scab.

My first instinct was wanting to pick off the abscess, which is what I ended up doing but not until I had my Country Girl-friend take a look.

I knew this wasn't something I should jump into on my own.

When Country Girl first saw Dragon she said "Why didn't you take care of this a long time ago"

Yes, I'm a bad chicken mommy, I didn't notice it.
Really, I feel awful saying that.

Country Girls instinct was the same as mine, she yanked the abscess off.
Maybe we should have sanitized the affected area first but we Are in the country

Ok, YOU should clean the chickens foot prior to performing this surgery that ended up taking almost 2 hours!

my disclaimer
This entire procedure was a learn as you go experience for me.
If you find yourself in this same position I suggest you follow your chicken mommy (or daddy) instincts and do what is best for you and your chicken. You will find a lot of helpful information about bumblefoot on the web, research before you start or as you go along, like I did.
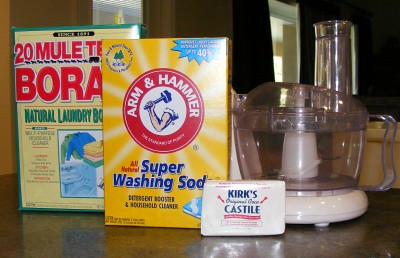
supplies needed:
towel
paper towels
gauze
vet wrap
tweezers
scalpel or needle
warm water
epsom salt
antibiotic ointment/solution (i.e. neosporin, betadin)

Here's the nitty gritty of what we did and some really gross pictures for those of you that like that stuff.

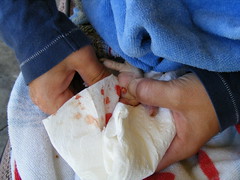
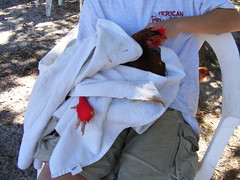
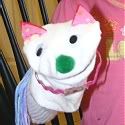
* to help the chicken relax, wrap her in a towel covering her head and body
leaving the injured foot exposed
* lay her on her side on your lap

bumble foot surgery

* soak chickens foot in a warm water epsom salt solution
* remove abscess from top of foot
* puss may be under the abscess or it may be deeper but this is only the beginning
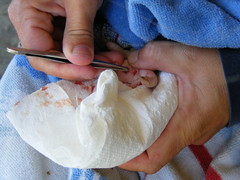
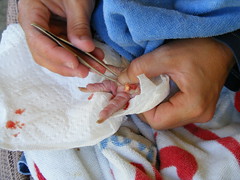
* using a sanitized scalpel or needle start to remove the bumble from the bottom of the foot
* carefully scrap away the hard bumble from the good tissue
* use tweezers as you go along to pull out chunks

the first part of this will be hard and scab like, under that
is a condensed puss root (I have no other better way to describe it)
you need to remove all of this and yes it is deep and there can be a lot

bumble foot surgery

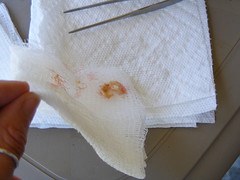
Several of these condensed puss roots were removed.
Each time one was removed you could feel her foot pad getting softer.
We knew we were getting the source of her problem out.

bumble foot surgery

bumble foot surgery

bumble foot surgery

bumble foot surgery

Like I mentioned it took a long time to do this.
We soaked her foot a couple times to help soften the bumble during the procedure.
In my opinion, Dragon was relaxed, she rarely tried to pull her foot away.

When we were sure we removed all the bumble we soaked her foot in another epsom salt bath and dried her foot completely.
The only ointment I had was neosporin.
We applied a generous amount to the top and bottom of her foot.
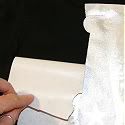
I also did not have vet wrap so I used gauze and medical/bandage tape to wrap her foot.

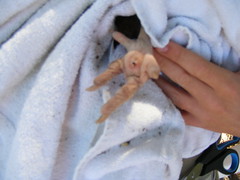
look at this great wrap job

Surgery complete - foot wrapped

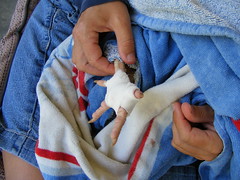
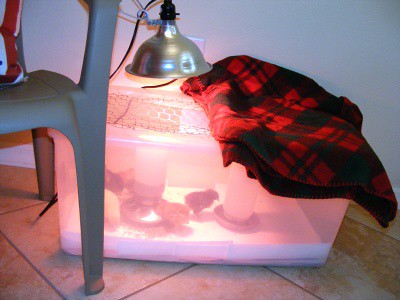
Here she was right after the surgery

Red Star recovering from Bumble Foot

Red Star recovering from Bumble Foot

Red Star recovering from Bumble Foot

Here she is the morning after

Red Star recovering from Bumble Foot - life back to normal

This morning I removed the her gauze bandage

Red Star recovering from Bumble Foot

Red Star recovering from Bumble Foot

I put betadine on the top and bottom of the wound.
Put new gauze on the wounds and wrapped the foot in vet wrap.

Red Star recovering from Bumble Foot

My goal is to keep her foot dry and clean.
I will change her bandage at least once a day and apply antibiotic ointment or solution to fend off bacteria and help her foot heal.

**What I've learned
bumblefoot is caused by small wounds or injury to the chickens foot. This could be from stepping on a thorn or nail also from a chicken jumping off high places causing bruising that can result in the bumble. The bumble starts out on the bottom of the foot eventually causing swelling.
Left un-noticed (like mine) an abscess will form on the top of the foot, usually between the toes. If the bumble is not treated the chicken may eventually die from infection.
After treating the abscess it can return if the entire bumble has not been removed.

Visit my flickr account for additional photos and check back for bumble foot updates.

~Patricia

Saturday, July 3, 2010

Easy - Patriotic 4th of July Cupcake - How To

patriotic cupcakes

These cupcakes are show stopper!
  • Make your favorite Yellow/White Box Cake or scratch recipe.
  • When the batter is made, divide into equal 3 parts
  • Add blue food coloring to one part and red to another, until desired color is reached
  • Use a spoon to add each color to the cupcake tins one at a time
  • Bake according to recipe instructions
  • When cool, add icing using a pastry bag with decorative tip
  • Don't forget the Sprinkles ;)
YUMMY
~Patricia

Wednesday, June 23, 2010

20% off Patriotic Bling Tee's

BIN get it in time for the 4th of July

Custom Firecracker Bling T

Custom MADE in the USA Bling T for Boys and Girls

You can find these shirts & more in my etsy shop, eBay and my website.

~Patricia

Tuesday, June 15, 2010

Painted Shirt - Freezer Paper Stencil Tutorial

Freezer Paper Stencils are a quick and easy craft for the whole family.
You may already have many of the supplies around the house.

Supply List:
printer or pencil to draw your own design
freezer paper
material or shirt
Xacto knife
cutting mat
iron or heat press
fabric paint
stipple or spouncer paint brush
tapered foam brush
tweezers

Step 1
Freezer Paper Stencil step 1

Cut the freezer paper to size. It will need to be larger than the design to avoid getting paint outside the intended design area.
Draw or Print directly onto the freezer paper.
If printing be sure to print on the non-wax side of the paper.
Also, text does Not need to be in mirror image. How you see the design on the freezer paper is exactly how it will look on the material.

Step 2
Freezer Paper Stencil step 2

Using a sharp Xacto knife, cut the design out of the freezer paper.

Time Saving Tip: If you plan to make multiples of the same design, stack and tape additional blank freezer sheets under the printed design and cut all at once.

Step 3
Freezer Paper Stencil step 3

Lay out the design on the material, shinny side down.
Follow the heating instructions on the freezer paper box to apply the design to the material.

Freezer Paper Stencil step 4

All the designs I made had elements within that I did not want painted.
Using the pieces cut out of the freezer paper, place and iron where desired.

Freezer Paper Stencil step  4-1

Step 5
Freezer Paper Stencil step 5

Gather your painting supplies.
Above is a picture of a Spouncer Sponge and a Stipple Brush.
I prefer to apply paint with a Spouncer because I feel it is less likely to cause the paint to bleed under the edge of the paper. But I have used both...
use what you have on hand or what you prefer.

Freezer Paper Stencil step 6

Above is the Jacquard Lumiere Metallic Silver paint I used
and a tapered foam brush.
Note: I did not use the regular bristle paint brush in this project.

Prior to applying the paint put a sheet of freezer paper between the layers of the material to prevent bleed through.

Now your ready to paint!
First use the spouncer/stipple brush.
Dip the brush into the paint.
When stippling it is important not to use too much paint. You do not want the brush dripping.
If needed tap the brush on a paper towel to remove excess paint.

To stipple: use light pressure dabbing the brush up and down on the surface of the material.
Apply one thin, even layer of paint.
Allow to dry to the touch and apply additional coats until desired effect is reached.

Freezer Paper Stencil step 7

After I apply my last coat with the stipple method, I gently sweep a tapered foam brush over the design in one direction. I feel it creates a smooth even finish.

Step 6
Freezer Paper Stencil step 8

Allow paint to dry completely.

Step 7
Freezer Paper Stencil step 9

Remove stencil.
For tough areas use pointed craft tweezers to gently scrape the paper off.

Freezer Paper Stencil step 10

Step 8 (optional)
Some fabric paint requires heat setting to allow for the item to be washed, others do not.
Read the instructions that came with your fabric paint.

The Jacquard I used does require heat setting.
Per the manufacturers instructions:
Air dry for 24 hours, heat set by ironing both sides for 30 seconds at temperature suited to fabric. After heat set, colors are washable or drycleanable.

Here's your completed shirt

Freezer Paper Stencil completed shirt

For more freezer stencil shirt ideas, visit my Flickr account.

~Patricia

Friday, April 23, 2010

New Painted Tee

Here's another for the Boys Painted T collection

guitar skull shirt

These shirts are so much fun to make! I snapped a bunch of pic's..tutorial coming :)

~Patricia

Thursday, April 22, 2010

Revisiting last Earth Day and Earth Day Ideas

I would like to do a new Going Green post today (not sure I'll have time), So for now I want to recap the posts from last Earth Day.

laundry soap

I no longer use the powdered version because it did not work well in my HE washer.
If I have time later today (or this week) I will post a "How To" for Liquid Laundry Soap...so check back :)


tshirt bag

The is is a fun and quick project that the kids can help out with.
Also makes a great alternative to a paper gift bag!

Things to do on Earth Day & Everyday
plant a tree or garden
turn off the lights & TV
recycle, upcycle
donate unwanted items
have a garage sale
start a compost pile
carpool
ride your bike...good for you & the environment
clean up trash in a park or along the roadside
replace your light bulbs with energy efficient ones
be self sufficient: buy baby chicks at your farm and feed store
buy organic food and clothing


My Going Green and Self Sufficient Living Flickr pic's
Visit my Flickr photos

~Patricia

Happy Earth Day 2010

Happy Earth Day from One Boy One Girl Boutique

earth day 2010

Visit us on etsy at http://oneboyonegirlboutqie.etsy.com
Our website http://oneboyonegirlboutqieboutique.com
OBOGboutique Twitter
and
Facebook

~Patricia

Thursday, April 1, 2010

The Chicken Show - Martha Style

Don't Miss It!
Tune into this Friday's episode of the Martha Stewart Show, which is all about backyard chickens. The show features special guest Traci Torres, My Pet Chicken founder, talking about how to care for baby chicks.

I'm a big fan of My Pet Chicken, I purchased my first group of chickens from them last spring. They were so helpful on the phone...I called them several times before my baby chicks arrived in the mail, you know with all those nervous 1st time mom questions ;)

Martha is also going to share yummy eggs recipes, because we all know for how much I Love my chickens, I Love eating their eggs even more!

and Egg Crafts!!!

~Patricia

Wednesday, March 31, 2010

New - Boys Painted Tees

One Boy One Girl Boutique's new line of Boys Painted Tees were such a hit when they debuted at the Easter Market.

I haven't had a chance to list custom painted tees on my website or the ready to ship ones on etsy, as of yet.

You can see all the tees I featured at Market in my Flickr account.

Here's a sample of a few

robot
monster truck
silver tie star
black tie skull
black guitar star

~Patricia

Tuesday, March 30, 2010

Eggstravaganza Market

We had a fabulous time at this past weekends Easter Market.
My kids love spending time at Heritage Village, especially when the Village is hosting a special event. The Eggstravaganza had free cupcake decorating, kids crafts, child singing and dance performers and the much anticipated Egg Hunt!


~Patricia

Monday, March 29, 2010

Jack Hartmann - Concert

The kids school hosted a free Jack Hartmann concert this evening.
Who's Jack Hartmann, you say?
That's what I've been asking for months as Isabella has danced around the house singing his infectious songs.

Isabella insisted that we go to the event. I brought both Isabella (5) and Trenton (very soon to be 12) to the show. Of course, I was going for the free lemonade and ice cream sandwiches ;) provided by the PTO.

As soon as Jack Hartmann hit the stage he had everyone and I mean everyone out of their seats while he taught us cute dances that we all performed while he sang songs about counting, math and rhyming.
Teachers joined him on stage for a silly chicken counting dance, than he requested older kids, 3rd grade+ to come up and sing along to a multiplication song.
Trenton who happily (with no encouragement from me) danced along to all the songs, ran up to the stage to take part in the multiplication song!
I got very sentimental thinking about how old he is getting and that this may be one of the last uninhibited child like activities he takes part in, willingly :(

Isabella danced next to me for a couple songs, then she grabbed her girlfriends and was front and center by the stage.
I would compare her reaction to someone seeing the Beetles, well in her case Miley Cyrus!


It was a fantastically fun show...we bought 2 Cd's on the way out and got a picture signed!

Isabella's favorite songs:
Hip-Hop Tooty Ta
The Cowboy Dance
Mr. Alligator Can Chomp
Let's Get Fit (Counting to 100 by 1's)
Chicken Count

About the music:
Strengthen your Reading, Math, Science & Fitness Programs
this school year
with the
Power of Music!

Jack Hartmann's Hop 2 It Music™
"the very best in curriculum - based educational music for children"

~Patricia

Tuesday, March 23, 2010

New Arrivals

new arrivals_march 23, 2010

Picked up this morning at our local American Farm and Feed Store
4 day old baby chicks
2) Rhode Island Reds
2) Barred Rock
2) Ameraucana
2) Black Giant (aka Jersey Black Giants)

New breeds to our chicken family are the Ameraucana, which are known for laying blue eggs and the Black Jersey Giant, as it's name implies it's large/heavy and can grow up to 11 pounds!

brooder 2010

We are using the brooder that we made last year. It's a large plastic storage container with the center of the lid cut out and replaced with chicken wire.
Normally I use 2 heat lamps (red bulbs) but one blew. For now I added the blanket to reduce heat loss.

The storage container makes for easy cleaning.
While the chicks are small I line the bottom with newpaper and paper towels, it gives the chicks a solid surface to walk on to help build strong legs. At this age I clean out the brooder several times a day by rolling up the dirty papers and adding new.

When the chicks are larger I will add pine shaving to the bottom. Once a day I will move the chicks to a box and dump out the pine shavings, rinse and dry the container and add fresh shavings.

~Patricia