Showing posts with label Tutorials/Printables. Show all posts

Saturday, July 3, 2010

Easy - Patriotic 4th of July Cupcake - How To

patriotic cupcakes

These cupcakes are show stopper!
  • Make your favorite Yellow/White Box Cake or scratch recipe.
  • When the batter is made, divide into equal 3 parts
  • Add blue food coloring to one part and red to another, until desired color is reached
  • Use a spoon to add each color to the cupcake tins one at a time
  • Bake according to recipe instructions
  • When cool, add icing using a pastry bag with decorative tip
  • Don't forget the Sprinkles ;)
YUMMY
~Patricia

Tuesday, June 15, 2010

Painted Shirt - Freezer Paper Stencil Tutorial

Freezer Paper Stencils are a quick and easy craft for the whole family.
You may already have many of the supplies around the house.

Supply List:
printer or pencil to draw your own design
freezer paper
material or shirt
Xacto knife
cutting mat
iron or heat press
fabric paint
stipple or spouncer paint brush
tapered foam brush
tweezers

Step 1
Freezer Paper Stencil step 1

Cut the freezer paper to size. It will need to be larger than the design to avoid getting paint outside the intended design area.
Draw or Print directly onto the freezer paper.
If printing be sure to print on the non-wax side of the paper.
Also, text does Not need to be in mirror image. How you see the design on the freezer paper is exactly how it will look on the material.

Step 2
Freezer Paper Stencil step 2

Using a sharp Xacto knife, cut the design out of the freezer paper.

Time Saving Tip: If you plan to make multiples of the same design, stack and tape additional blank freezer sheets under the printed design and cut all at once.

Step 3
Freezer Paper Stencil step 3

Lay out the design on the material, shinny side down.
Follow the heating instructions on the freezer paper box to apply the design to the material.

Freezer Paper Stencil step 4

All the designs I made had elements within that I did not want painted.
Using the pieces cut out of the freezer paper, place and iron where desired.

Freezer Paper Stencil step  4-1

Step 5
Freezer Paper Stencil step 5

Gather your painting supplies.
Above is a picture of a Spouncer Sponge and a Stipple Brush.
I prefer to apply paint with a Spouncer because I feel it is less likely to cause the paint to bleed under the edge of the paper. But I have used both...
use what you have on hand or what you prefer.

Freezer Paper Stencil step 6

Above is the Jacquard Lumiere Metallic Silver paint I used
and a tapered foam brush.
Note: I did not use the regular bristle paint brush in this project.

Prior to applying the paint put a sheet of freezer paper between the layers of the material to prevent bleed through.

Now your ready to paint!
First use the spouncer/stipple brush.
Dip the brush into the paint.
When stippling it is important not to use too much paint. You do not want the brush dripping.
If needed tap the brush on a paper towel to remove excess paint.

To stipple: use light pressure dabbing the brush up and down on the surface of the material.
Apply one thin, even layer of paint.
Allow to dry to the touch and apply additional coats until desired effect is reached.

Freezer Paper Stencil step 7

After I apply my last coat with the stipple method, I gently sweep a tapered foam brush over the design in one direction. I feel it creates a smooth even finish.

Step 6
Freezer Paper Stencil step 8

Allow paint to dry completely.

Step 7
Freezer Paper Stencil step 9

Remove stencil.
For tough areas use pointed craft tweezers to gently scrape the paper off.

Freezer Paper Stencil step 10

Step 8 (optional)
Some fabric paint requires heat setting to allow for the item to be washed, others do not.
Read the instructions that came with your fabric paint.

The Jacquard I used does require heat setting.
Per the manufacturers instructions:
Air dry for 24 hours, heat set by ironing both sides for 30 seconds at temperature suited to fabric. After heat set, colors are washable or drycleanable.

Here's your completed shirt

Freezer Paper Stencil completed shirt

For more freezer stencil shirt ideas, visit my Flickr account.

~Patricia

Thursday, April 22, 2010

Revisiting last Earth Day and Earth Day Ideas

I would like to do a new Going Green post today (not sure I'll have time), So for now I want to recap the posts from last Earth Day.

laundry soap

I no longer use the powdered version because it did not work well in my HE washer.
If I have time later today (or this week) I will post a "How To" for Liquid Laundry Soap...so check back :)


tshirt bag

The is is a fun and quick project that the kids can help out with.
Also makes a great alternative to a paper gift bag!

Things to do on Earth Day & Everyday
plant a tree or garden
turn off the lights & TV
recycle, upcycle
donate unwanted items
have a garage sale
start a compost pile
carpool
ride your bike...good for you & the environment
clean up trash in a park or along the roadside
replace your light bulbs with energy efficient ones
be self sufficient: buy baby chicks at your farm and feed store
buy organic food and clothing


My Going Green and Self Sufficient Living Flickr pic's
Visit my Flickr photos

~Patricia

Thursday, July 16, 2009

Sock Puppets

Is it Hot or Raining outside?
From crafting to playing, sock puppets provided my kids with hours of fun!

The other day I got the usual "Mom we're board...lets do a project!"
I sigh, as I think about all the things I need to get done around the house.

What can the kids make without much help from me??
How about puppets!
This thought started out as paper bag puppets, in my mind.
As I grabbed a stack, Bella said "No Mama, SOCKS"

I can never can find matching socks when we need them...that works perfect for this craft!

My other issue with socks, is that none of ours "look" clean.
Kids in and out of the house all day, more often than not the kids are shoeless and socks (if they are wearing them LOL) get worn outside.
What's the deal with that??

I remembered a sock puppet a teacher had that had a "hard mouth".
Problem Solved...More on that later

While the kids looked for socks, I got out glue (regular & hot glue), markers, fabric scraps, felt, cotton balls, ribbon and google eyes.

With the kids hard at work on traditional sock puppets, I worked on my new version.


How to get rid of the dirty bottom on the sock ;) and make a better puppet

Using a cereal box I cut out an oval approx. 2.5 by 4 inches
(this worked well on an adult sock)
Depending on the size of your sock you may need to adjust the size.

Fold the oval in half, use scissors or a ruler to press down the crease.

Push the cardboard to the tip of the sock.
Put your hand in, with fingers on top and thumb on the bottom of the cardboard, test out the mouth to make sure it is where you want it.
Now, cut a smaller oval in the sock, where you want the mouth.

Ick, look at that dirty sock!

Glue the cardboard to the inside of the sock.
I used hot glue so it would dry faster but any glue will work.

To make it look more like a mouth.
cut out another oval from fabric or paper and glue it on top.
Check it out, looks awesome, right?

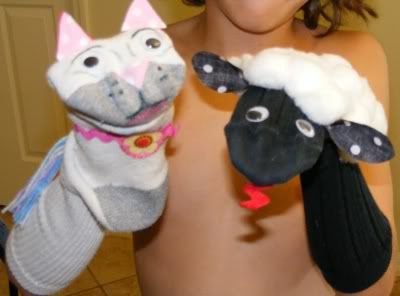
Here are a few of the puppets the kids and I made
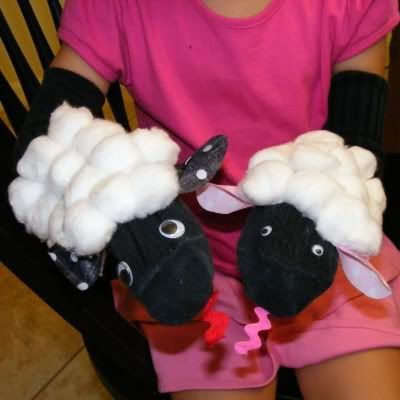
Sheep (using cotton balls for the woolly fur)

A Cute cat with the "hard mouth", yarn tail and ricrac collar

Puppy dogs with floppy ears
(those are our dogs Onyx and Yota...really they look just like them!)

Another cat and Bella's version of our dog Onyx

Bella enjoyed chasing us around the house having her puppet bit us, LOL

Happy Crafting!
~Patricia

Sunday, May 3, 2009

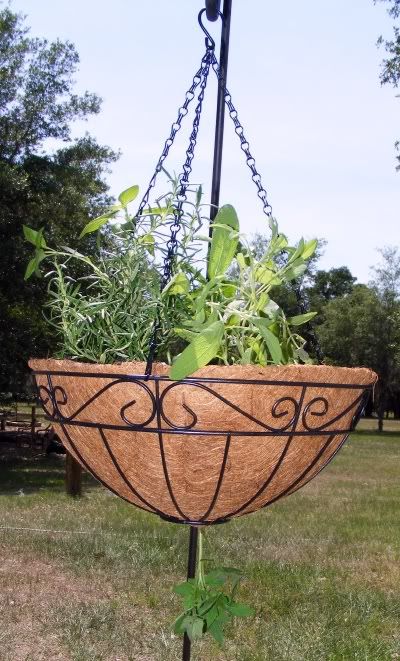
Homemade Topsy Turvy

I mentioned in my previous post that you don't need a special "sold on TV" pot to grow tomato plants upside down.

Here's what you need to make your own:
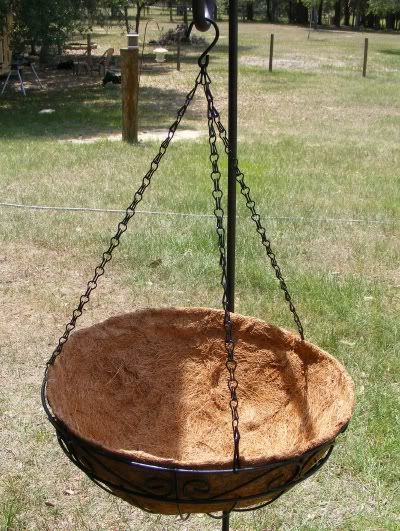
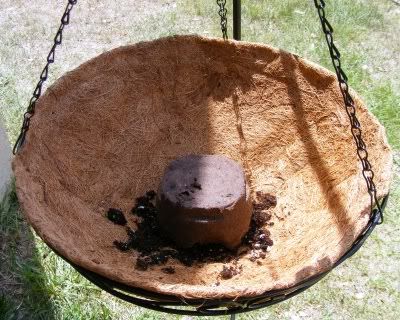
Coconut Fiber Hanging Basket (I used 14"x6")
Tomato Plant
Garden Soil

Choose a strong wire basket.
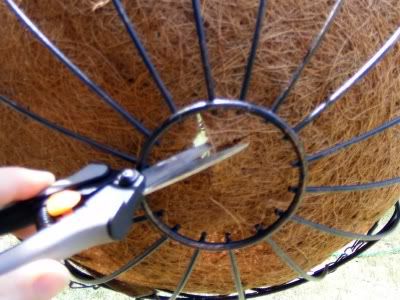
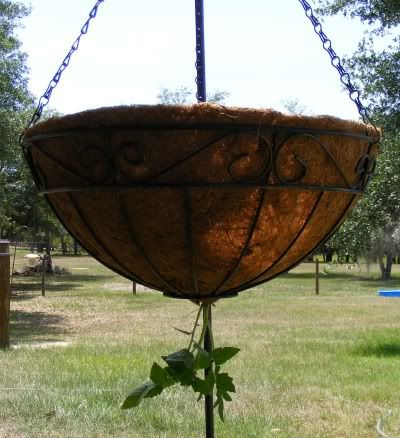
I lucked out that this one had an open circle on the bottom creating the perfect place for the tomato plant to rest.

Cut a cross in the bottom center of the basket.

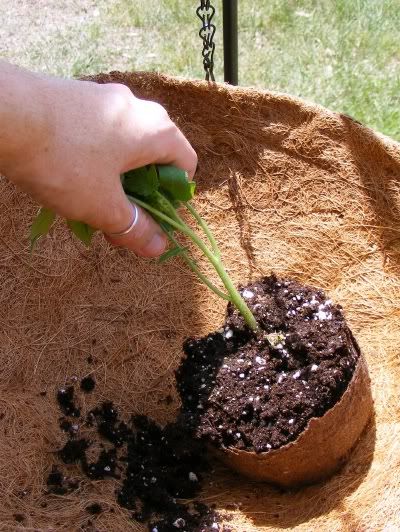
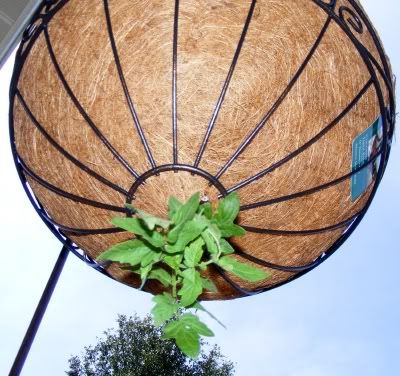
A small tomato plant will be easiest to fit through the hole.
Gather the branches, gently push them through the hole while turning the plant upside down.

Super easy and none of the branches broke!

Aww, how cute ;)


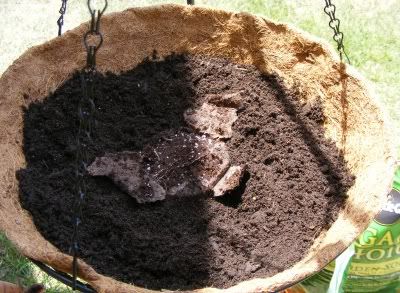
If your plant comes with a peat pot and you leave it on, I suggest breaking apart the bottom to help the roots spread.
Fill with Garden Soil and Your done.
OR
You can take it a step further and add to it's function.
Add Flowers or Herbs on top to make an extra attractive Homemade Topsy Turvy!

~Patricia

Wednesday, April 22, 2009

Upcycle ~ T-Shirt Bag

Earth Day Upcycle Craft

How to make a Bag from an old T-Shirt

I chose an old dingy shirt that does not fit my son anymore.

Lay the shirt out flat, seams together
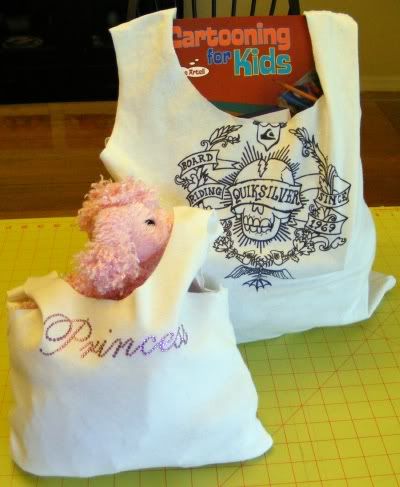
Cut the sleeves off using a rotary cutter or scissors
Depending on the size of your shirt cut a 7-8 inch circle around the neck
I used this helpful circle cut ruler but you could also lay a large bowl on the shirt to use as a guide.

Turn the shirt inside out, pin along the hem
Sew the bottom of the shirt closed...I went back over it a second time to reinforce the stitch.

Turn right side out.


You're done!

It was so quick and easy I made one for my daughter ;)
~Patricia

Reduce Reuse Recycle & Upcycle

Happy Earth Day!
To celebrate the day I have a couple Environment Friendly projects.

Going Green for me is not just about helping the environment, it's also about saving money.
I thought a good way to start is making my own laundry detergent.

Of course I can't find my receipt so I don't have the numbers on this.
The last time I bought "regular" commercial laundry detergent I think it cost me around $15.00-17.00 and I bought the HE kind for 64 loads.

The ingredients to make this detergent only cost a few dollars.
The recipe it self would be under $2.00 for approx. 40 loads (maybe less if I knew the numbers LOL).

Homemade Powdered Laundry Detergent

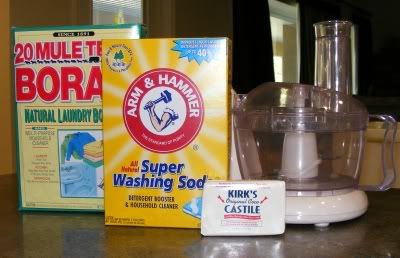
What you need:
1 Bar Soap (Pure & Natural, Kirk's, Fels-Naptha or one you prefer)
1 Cup Washing Soda (not baking soda)
1/2 Cup Borax

You can Grate or Chop the bar soap.
If you Grate you do not need to use a Food Processor.
Since I am making a Powder Detergent I wanted it really fine, so I chopped and put it in a Food Processor.

If using a Processor, put all your ingredients in...
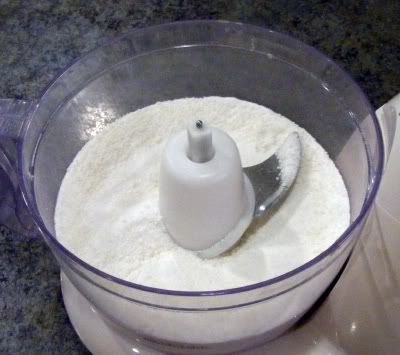
Pulse until well mixed and fine.

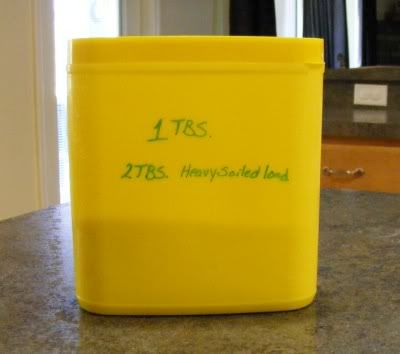
I recycled a plastic container to store the powder.

If you didn't use a Food Processor, just Grate the bar and mix the ingredients.

You can mix a few drops of essential oil in as well, perhaps orange, lavender or tea tree.

To Use:
1 TBS or 2 TBS for heavily soiled loads

There is also a recipe to make this a liquid detergent. I haven't tried it yet.
When I do, I'll post it.

additional info:
Why I chose Kirk's Soap
No Animal By-Products, Never Tested on Animals, Hypoallergenic, Biodegradable, No Synthetic Detergents

Check back later for a fun Upcycle project!
~Patricia

Friday, February 6, 2009

Be Still my Beating Heart

We've gone heart crazy in preparation for valentines day.

Faux Stained Glass Hearts.
*Warning this can be a messy project

Materials:
2 sheets Wax Paper, Glue, Water, Tissue Paper,
embellishments to decorate your heart (optional)

Start by mixing equal parts water and glue, tear/cut up tissue paper, you can draw shapes on the wax paper at guides.
Dip the tissue paper in the glue mixture and lay in desired location on the wax paper.
When you are done place the 2nd wax sheet on top, so the tissue paper is sandwiched in between the layers.
Let dry 24hrs (depending on how much glue your little one uses)
Cut out the shapes when dry.
Hang them around the house or attach them to cards to give as valentines


Next up
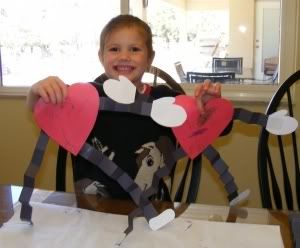
Wiggly Arm Hearts
This one is super easy!

Trace & cut out a heart shape
Decorate the heart
Cut strips of paper for the arms and legs
Accordion fold the strips
Glue the arms and legs to the heart
Cut out Shapes for hands and feet
Glue them to the arms and legs
You're done :)

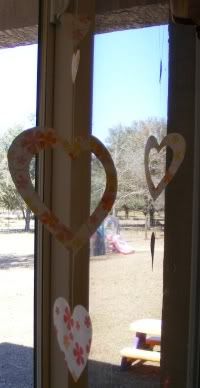
Heart Mobiles
I downloaded scrap booking paper images from Tricia-Rennea Art
Traced heart shapes in different sizes
Cut & Hang for a Fun decoration

Be Mine Heart Garland
I made this in Word, Printed it, Cut it and strung on ribbon
I'd love to share the document but I can't figure out how to post a pdf file in my blog
If I ever do I'll post it or you can email me for it.
*Revised*
Here's a download to the
Be Mine Garland


I stitched up a felt conversation heart while watching TV and I forgot to stuff it!
Still looks cute ;)

hmmm, who should I give it too??

~Patricia