Showing posts with label Pets. Show all posts

Friday, October 15, 2010

Chicken with Bumblefoot - warning not for the squeamish

What the heck is wrong with my chickens foot?! Is she growing a new toe, why is she limping, hmm she's holding her foot up, Why?

I spend time with my chickens each day but I obviously don't pay attention to their feet (lesson learned). All the girls seem happy and healthy but I had no idea something was festering on the bottom of Dragon's foot.

Dragon is a year and half old Red Star hen.
A few days ago I was asking my self the very questions above.
Upon close inspection of her foot I knew something was wrong but what and how do I fix it without spending a fortune taking her to a vet.

Unfortunately I did not take a picture of her foot, I really wish I had because I know it would be helpful to other backyard chicken friends.

Here's what I saw:
Dragon had a large scab like abscess on the top of her foot and her foot was swollen.
On the bottom of the foot was the source of her discomfort, a 3mm sized black flat scab.

My first instinct was wanting to pick off the abscess, which is what I ended up doing but not until I had my Country Girl-friend take a look.

I knew this wasn't something I should jump into on my own.

When Country Girl first saw Dragon she said "Why didn't you take care of this a long time ago"

Yes, I'm a bad chicken mommy, I didn't notice it.
Really, I feel awful saying that.

Country Girls instinct was the same as mine, she yanked the abscess off.
Maybe we should have sanitized the affected area first but we Are in the country

Ok, YOU should clean the chickens foot prior to performing this surgery that ended up taking almost 2 hours!

my disclaimer
This entire procedure was a learn as you go experience for me.
If you find yourself in this same position I suggest you follow your chicken mommy (or daddy) instincts and do what is best for you and your chicken. You will find a lot of helpful information about bumblefoot on the web, research before you start or as you go along, like I did.

supplies needed:
towel
paper towels
gauze
vet wrap
tweezers
scalpel or needle
warm water
epsom salt
antibiotic ointment/solution (i.e. neosporin, betadin)

Here's the nitty gritty of what we did and some really gross pictures for those of you that like that stuff.

* to help the chicken relax, wrap her in a towel covering her head and body
leaving the injured foot exposed
* lay her on her side on your lap

bumble foot surgery

* soak chickens foot in a warm water epsom salt solution
* remove abscess from top of foot
* puss may be under the abscess or it may be deeper but this is only the beginning
* using a sanitized scalpel or needle start to remove the bumble from the bottom of the foot
* carefully scrap away the hard bumble from the good tissue
* use tweezers as you go along to pull out chunks

the first part of this will be hard and scab like, under that
is a condensed puss root (I have no other better way to describe it)
you need to remove all of this and yes it is deep and there can be a lot

bumble foot surgery

Several of these condensed puss roots were removed.
Each time one was removed you could feel her foot pad getting softer.
We knew we were getting the source of her problem out.

bumble foot surgery

bumble foot surgery

bumble foot surgery

bumble foot surgery

Like I mentioned it took a long time to do this.
We soaked her foot a couple times to help soften the bumble during the procedure.
In my opinion, Dragon was relaxed, she rarely tried to pull her foot away.

When we were sure we removed all the bumble we soaked her foot in another epsom salt bath and dried her foot completely.
The only ointment I had was neosporin.
We applied a generous amount to the top and bottom of her foot.
I also did not have vet wrap so I used gauze and medical/bandage tape to wrap her foot.

look at this great wrap job

Surgery complete - foot wrapped

Here she was right after the surgery

Red Star recovering from Bumble Foot

Red Star recovering from Bumble Foot

Red Star recovering from Bumble Foot

Here she is the morning after

Red Star recovering from Bumble Foot - life back to normal

This morning I removed the her gauze bandage

Red Star recovering from Bumble Foot

Red Star recovering from Bumble Foot

I put betadine on the top and bottom of the wound.
Put new gauze on the wounds and wrapped the foot in vet wrap.

Red Star recovering from Bumble Foot

My goal is to keep her foot dry and clean.
I will change her bandage at least once a day and apply antibiotic ointment or solution to fend off bacteria and help her foot heal.

**What I've learned
bumblefoot is caused by small wounds or injury to the chickens foot. This could be from stepping on a thorn or nail also from a chicken jumping off high places causing bruising that can result in the bumble. The bumble starts out on the bottom of the foot eventually causing swelling.
Left un-noticed (like mine) an abscess will form on the top of the foot, usually between the toes. If the bumble is not treated the chicken may eventually die from infection.
After treating the abscess it can return if the entire bumble has not been removed.

Visit my flickr account for additional photos and check back for bumble foot updates.

~Patricia

Friday, January 2, 2009

December 2008

December has come and gone.
Here's a look back at at our holiday season.

Making Smores

Holiday Cards

Snow in Florida??

Visits with Santa

Parties

Visiting with PopPop

Bella's Rice Crispy Treats

Christmas Morning

What Cats & Dogs like to do over the holidays
new pup :)
a couple month ago we inherited a stray puppy.
In the far ground of the above picture is Yota. He's an 8 month old Catahoula.
He a fascinating addition to our family. He gets along great with both Onyx (black lab) and Blu (Siamese mix cat).
Onyx has never been happier and loves playing with him all day and sleeping curled up together at night.
I almost don't know how we lived without him ~ Welcome Yota!


Birthdays

We ended the year with fireworks, smores & oysters by a bonfire in our backyard, shared with Grandpa Bob and neighbors stopping by to wish us a Happy New Year!

~Patricia

Tuesday, April 15, 2008

Could Gardening be any Easier!

This past weekend we setup our first vegetable garden at our new home.

In the past we have gardened the traditional single row way.
Spending a day tilling a large plot of land and the next couple days adding compost to Florida's sandy soil.
It was back breaking work!
But who doesn't love to watch a garden grow and relish the joy of picking your first vegetable.

That's all well and good until the garden becomes over grown and filled with weeds!
By summers end no one wants to walk in the garden and it sits in the yard as an unsightly mess!

Even though we have more than enough land here, I wanted to find an easier, more enjoyable way to garden with the kids.

With a little research I came across a book about Square Foot Gardening

I have gardened in a raised bed before but the concept of this book was to start with the Perfect Soil (the exact recipe for that is in the book) and to break up your raised bed into square feet to better utilize the small space. The book goes over exactly how many plants of each vegetable can be planted in one square foot.

The basic box is 4x4ft using 2x6inch boards.
Because I am a rule breaker by nature I chose to use 2x8's ;)
You can get the wood cut to size at the lumber yard - Gotta Love That!

Here's David, Bella & Trenton putting the box together - Which took only minutes!


The book suggests adding a bottom to the box to keep weeds & grass form growing. You can use weed tarp or a flattened card board box. If you use wood make sure to drill holes for the water to properly drain.
We used weed tarp and added chicken wire to keep moles out. We stapled the weed tarp and chicken wire to the box but that isn't necessary.

Once the box is finished move it to where you want your garden...it would be smart to build it where you want it...we built ours on the porch to avoid the hot sun.

Now your ready to add your Perfect Soil...if you don't have the book you can get basic direction's on the SFG website

The book has some crazy math to figure out exactly how much of each ingredient to use.
Math is not my strong suit
We used 1 44lb bag of Peat Moss, 2 different types of 40+lb bags of Compost and 1/2 a 4 cu ft bag of Vermiculite.
I was able to find all those items at Home Depot.
The mix was just enough to fill our 4x4ft 8inch high box.

We mixed all the ingredients on a tarp that Onyx-pup helped spread out for us ;)


Have two people hold opposite sides of the tarp and roll the ingredients to mix.
After it was mixed we shoveled a little into the box until we were able to lift the tarp and dump the rest.

Once filled we added a grid to plot out our 1 foot spaces and added our plants and seeds.

What we planted:
8 corn plants, 2 tomato, 1 green pepper, 1 red pepper, 1 hot pepper, 1 strawberry plant, 2 broccoli, oregano, basil, 8 heads of lettuce and 24 carrots

The project was fun and took a short time to put together...we are already planning another box!


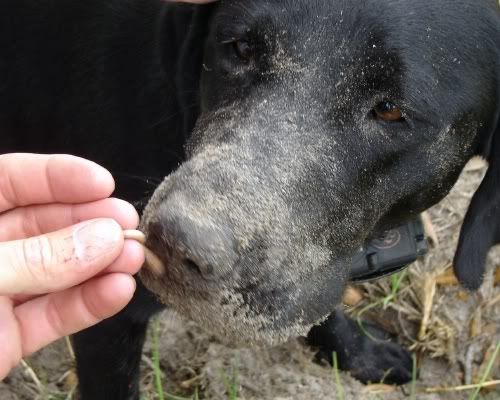
Later we sent Onyx-pup to sniff out some pesky moles!
She did a great job digging up an abandoned hole to find a little glass snake
Awww, Good Puppy!

~Patricia

Friday, March 14, 2008

Week In Review

This has been a week of Change, Deliveries, Organization, Style and Rest for some

Miss Bella goes Back to school! No it wasn't Spring Break.
She was a Pre-School Drop Out
Yes, that's right after a month of crying I decided she wasn't ready. That was back in September. We have talked about school everyday since and even waive to it when we drive by.
I don't know if she is ready or just tired of being stuck home with me, lol

Bella and I went back to school on Monday!
Our goal is Monday, Wednesday, Friday for only a half day...she refuses to take a nap at school.
No problem, I even told her I would go with her for the first few days IF she needed me to.
I went with her on Monday and on Wednesday she said "What are you doing here?"
(Funny, I was thinking the same thing)
I went home and picked up my Big Girl in a few hours and here is how the rest of our week went...

HOME at last


Blu really enjoyed his time without Bella


He even made a New Friend
The Pretty Stuffed Kitty had to be taken away...he got a little too excited


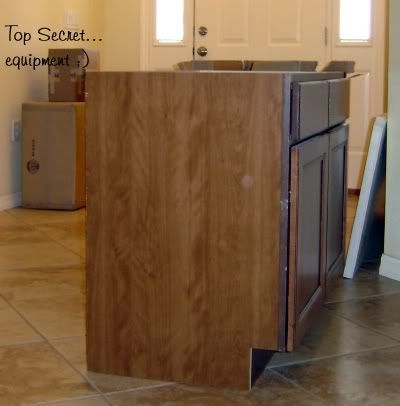
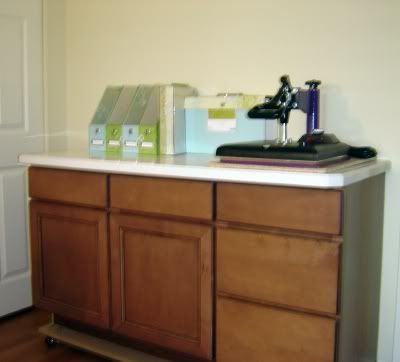
The arrival of New Cabinets for My Studio
and
Shh, Top Secret Equipment
(we can talk about that later)


LOVE IT!
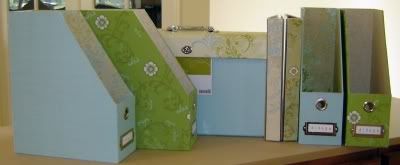
50% off at OfficeMax
in just the right colors too ;)

Trenton's Crazy Hair Day at School


Finish off the Week with the New Cabinets in Place
Oh but so much more work to be done!
~Patricia