Showing posts with label Holidays. Show all posts

Saturday, July 3, 2010

Easy - Patriotic 4th of July Cupcake - How To

patriotic cupcakes

These cupcakes are show stopper!
  • Make your favorite Yellow/White Box Cake or scratch recipe.
  • When the batter is made, divide into equal 3 parts
  • Add blue food coloring to one part and red to another, until desired color is reached
  • Use a spoon to add each color to the cupcake tins one at a time
  • Bake according to recipe instructions
  • When cool, add icing using a pastry bag with decorative tip
  • Don't forget the Sprinkles ;)
YUMMY
~Patricia

Wednesday, December 30, 2009

Visions of December dance in my head

A December filled with
Christmas parades, parties, crafting, handmade Christmas pj's,
baking and a whole lot of holiday cheer.


~patricia

Wednesday, March 18, 2009

St. Patrick's Day ~ Treats

I hadn't planned anything special for St. Patty's Day.
For goodness sake I haven't taken down our Valentine decorations, yet!
Yes, I know I am slacking.
The house should already be dressed up in pastel colors and bunny motifs for Spring and Easter.

We really have had a lot going on... surgeries, illness, upon illness, even a craft fair thrown in for added stress LOL

Feeling guilty about ignoring St Patrick's Day, I put together a couple quick festive treats for the kids last night.

Irish Soda Bread

The recipe is from All Recipes.
Since I didn't have buttermilk I used Martha's method for making your own using
1 1/3 whole milk mixed with 1/3 apple-cider vinegar
This gave me enough to mix in the recipe and some to brush on top of the loaf with melted butter.

Shamrock & Spring Flower Sugar Cookies


Another one from All Recipes (I couldn't live without that site)

~Patricia

Friday, February 6, 2009

Be Still my Beating Heart

We've gone heart crazy in preparation for valentines day.

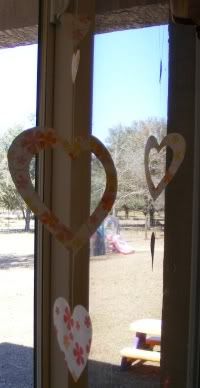
Faux Stained Glass Hearts.
*Warning this can be a messy project

Materials:
2 sheets Wax Paper, Glue, Water, Tissue Paper,
embellishments to decorate your heart (optional)

Start by mixing equal parts water and glue, tear/cut up tissue paper, you can draw shapes on the wax paper at guides.
Dip the tissue paper in the glue mixture and lay in desired location on the wax paper.
When you are done place the 2nd wax sheet on top, so the tissue paper is sandwiched in between the layers.
Let dry 24hrs (depending on how much glue your little one uses)
Cut out the shapes when dry.
Hang them around the house or attach them to cards to give as valentines


Next up
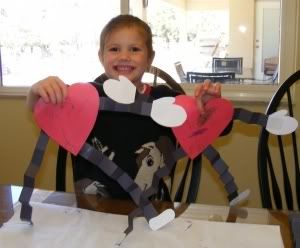
Wiggly Arm Hearts
This one is super easy!

Trace & cut out a heart shape
Decorate the heart
Cut strips of paper for the arms and legs
Accordion fold the strips
Glue the arms and legs to the heart
Cut out Shapes for hands and feet
Glue them to the arms and legs
You're done :)

Heart Mobiles
I downloaded scrap booking paper images from Tricia-Rennea Art
Traced heart shapes in different sizes
Cut & Hang for a Fun decoration

Be Mine Heart Garland
I made this in Word, Printed it, Cut it and strung on ribbon
I'd love to share the document but I can't figure out how to post a pdf file in my blog
If I ever do I'll post it or you can email me for it.
*Revised*
Here's a download to the
Be Mine Garland


I stitched up a felt conversation heart while watching TV and I forgot to stuff it!
Still looks cute ;)

hmmm, who should I give it too??

~Patricia

Friday, January 2, 2009

December 2008

December has come and gone.
Here's a look back at at our holiday season.

Making Smores

Holiday Cards

Snow in Florida??

Visits with Santa

Parties

Visiting with PopPop

Bella's Rice Crispy Treats

Christmas Morning

What Cats & Dogs like to do over the holidays
new pup :)
a couple month ago we inherited a stray puppy.
In the far ground of the above picture is Yota. He's an 8 month old Catahoula.
He a fascinating addition to our family. He gets along great with both Onyx (black lab) and Blu (Siamese mix cat).
Onyx has never been happier and loves playing with him all day and sleeping curled up together at night.
I almost don't know how we lived without him ~ Welcome Yota!


Birthdays

We ended the year with fireworks, smores & oysters by a bonfire in our backyard, shared with Grandpa Bob and neighbors stopping by to wish us a Happy New Year!

~Patricia

Monday, December 8, 2008

Christmas Trees and Pom poms

Make your own Christmas Tree
I have been eyeing these porch/entryway Christmas trees that I have been seeing at stores, for a while.
I've seen them in many sizes, with or without decorations and typically they range in price from $30-100.00+
I don't have much of a budget for holiday decorations this year, so I made my own.

I started with an empty flower pot and a tomato cage.
You can place the tomato cage upside down over the pot, like I did below

or if your pot is large enough you can place it in it

I used 3 9ft sections on 2ply pine garland that can be purchased for $3.99 each.
Wrap each section of garland around the tree and position the branches to fill in the empty spaces. It won't cover perfectly but trust me it will look fantastic when your done.

After the pine garland was in place, I wrapped a string of white lights around it and Bella added the faux poinsettia to make the tree look festive during the day.
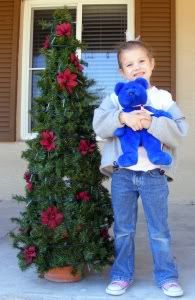
The tree looked awesome all lit up tonight.
After I make another I will post more pictures.


While at a holiday home tour I saw similar trees wrapped in moss and decorated with fruit.
One used only green apples, it looked beautiful.

Pompoms
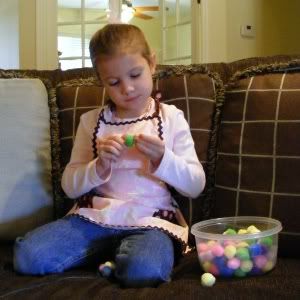
Bella has jumped on the Pom pom Garland craze.
This was an easy craft that she really enjoyed

She loved the fact that she could do it all by herself and it didn't take long.

Looks great on her and

on her very own Christmas tree!

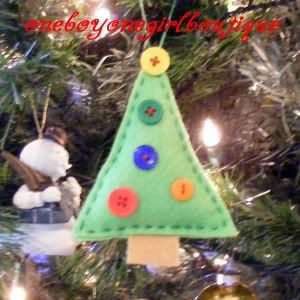
Felt Ornaments
Here's a sneak peak at a felt ornament I made

I am working on a couple other designs based on cookie cutter shapes.
When I'm done I will post my patterns so you can make your own.
Happy Decorating!
~Patricia

Tuesday, December 2, 2008

Ornament Crafts

While decorating the Christmas tree this past weekend I came across ornaments we have made over the years that are great kid crafting projects.
The first 2 are pipe cleaner ornaments.
Here's an easy candy cane that kids of all ages can make. We have them in several colors and sizes on the tree.

The snowflake may be better suited for older kids or the help from mom or dad to cut small pieces of pipe cleaners.
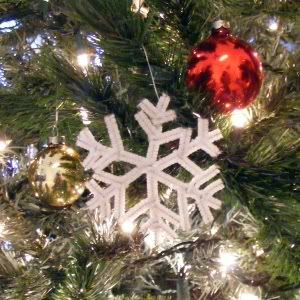
We had also made a wreath but I can't find it. If I make a new one I'll post a pic.

Trenton (10) and I made adorable reindeer ornaments when he was 3.
What a nice memory on our tree, we even have mommy and daddy reindeer hands...I think it's time Isabella made one ;)

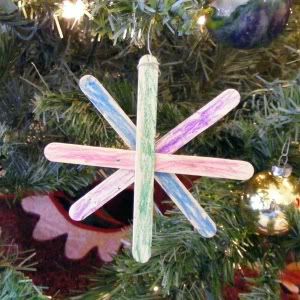
Isabella did make this Popsicle ornament, there are also a few decorated with sparkles.
I made this gingerbread man garland several years ago along with a snowman set for my sister.


Here's the recipe for the garland
3 cups all purpose flour
1 cup salt
1 cup water

Decorations:
Food Coloring, Glitter or Acrylic Paints

To make the dough, combine the flour, salt, and water in a mixing bowl.
Knead the dough until smooth and rubbery.

You can roll out the dough and use cookie cutters to make your shapes.
If you will be making the shapes for garland use a straw to make holes for the ribbon.

Bake at 275 degrees for 1 hour.

Paint the ornaments after they have cooled completely.

Happy Christmas Crafting!
~Patricia

Sunday, November 23, 2008

Thanksgiving Crafting and Stitching?

This past week we worked on a few Thanksgiving crafts.
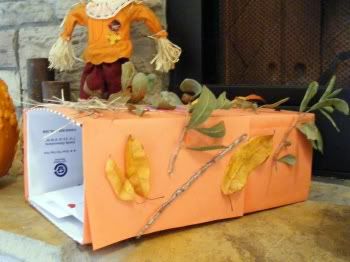
Isabella came up with her own way to give thanks to family we will have over for the holiday.
She made/decorated a Give Thanks Mailbox.
This was her own idea and she told me she plans to make a mailbox for every holiday.

She's already made several cards and drawings to give out on Thanksgiving.

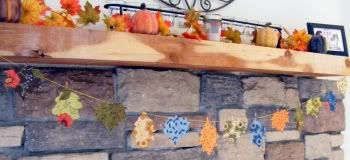
While Isabella worked on that, I made the Leaf Garland that was featured in Good Housekeeping.
This was an easy no sew project.

In years past we have talked about what we are thankful for but I thought Skip To My Lou's Thanksgiving Tree would be a good tradition to start as well.

This is not necessarily a Thanksgiving craft. This is my first stitching project and I have been working on it for a couple months in my spare time.
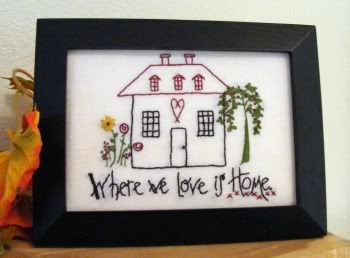
I absolutely love stitching! I chose this new hobby because it was something I could do anywhere; sitting on the couch with Dave while he watches tv, waiting for the kids at gymnastics or guitar lessons or many of the other times I am sitting in my car waiting for the kids (which feels like most of the week)


This stitching pattern is from Needle in a Haystack.
I purchased Stitching Essentials: An Introduction to the Art of Stitching
The eBook covers the basic fundamentals of stitching from choosing embroidery hoops, needles, floss, and fabric, to learning 7 basic embroidery stitches. Besides the step by step photos of the stitches and instructions on how to frame your finished project, the eBook also included the "Where we Love is Home" pattern.
I thought it was a great pattern to start with because all the stitches you learned are incorporated in the design.
I am totally hooked and am now well stocked with floss, hoops, fabric and felt to get started on lots of holiday decorations!

Almost forgot... Needle in a Haystack also offers a few Free patterns ;)

~Patricia