I just got back from a great family vacation in Montana. I can't wait to show you all the pictures...I have a lot to go through LOL
I want to take a minute to mention, that while I was away, my sock puppet craft was featured on the fabulous OnePrettyThing website
I am a huge fan of the site! Each day OnePrettyThing features crafty tutorials from all over the internet. It's definitly a site worth adding to your favorites :D
Thank You OnePrettyThing for featuring me!
~Patricia
Showing posts with label Kid Crafts. Show all posts
Wednesday, July 29, 2009
Thursday, July 16, 2009
Sock Puppets
Is it Hot or Raining outside?
From crafting to playing, sock puppets provided my kids with hours of fun!
The other day I got the usual "Mom we're board...lets do a project!"
I sigh, as I think about all the things I need to get done around the house.
What can the kids make without much help from me??
How about puppets!
This thought started out as paper bag puppets, in my mind.
As I grabbed a stack, Bella said "No Mama, SOCKS"
I can never can find matching socks when we need them...that works perfect for this craft!
My other issue with socks, is that none of ours "look" clean.
Kids in and out of the house all day, more often than not the kids are shoeless and socks (if they are wearing them LOL) get worn outside.
What's the deal with that??
I remembered a sock puppet a teacher had that had a "hard mouth".
Problem Solved...More on that later
While the kids looked for socks, I got out glue (regular & hot glue), markers, fabric scraps, felt, cotton balls, ribbon and google eyes.
With the kids hard at work on traditional sock puppets, I worked on my new version.


How to get rid of the dirty bottom on the sock ;) and make a better puppet
Using a cereal box I cut out an oval approx. 2.5 by 4 inches
(this worked well on an adult sock)
Depending on the size of your sock you may need to adjust the size.
Fold the oval in half, use scissors or a ruler to press down the crease.
Push the cardboard to the tip of the sock.
Put your hand in, with fingers on top and thumb on the bottom of the cardboard, test out the mouth to make sure it is where you want it.
Now, cut a smaller oval in the sock, where you want the mouth.
Ick, look at that dirty sock!
Glue the cardboard to the inside of the sock.
I used hot glue so it would dry faster but any glue will work.
To make it look more like a mouth.
cut out another oval from fabric or paper and glue it on top.
Check it out, looks awesome, right?
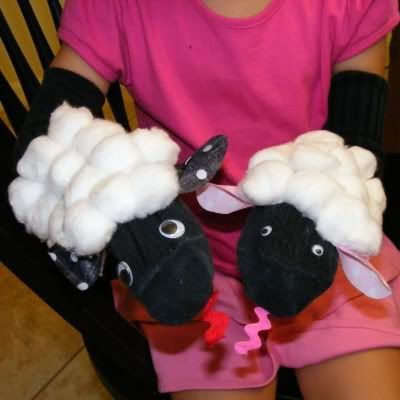
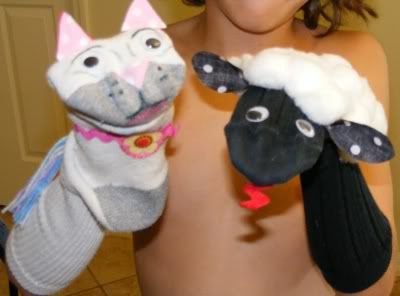
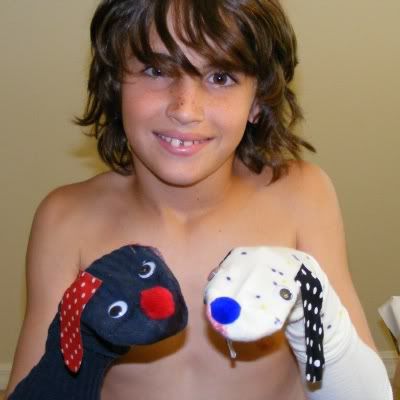
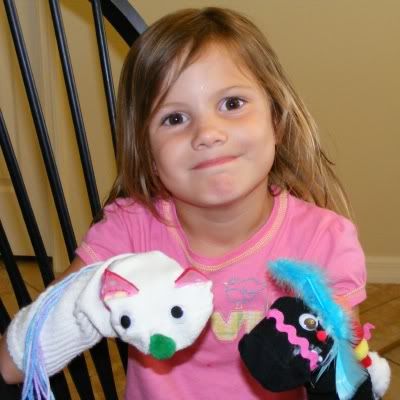
Here are a few of the puppets the kids and I made
Sheep (using cotton balls for the woolly fur)
A Cute cat with the "hard mouth", yarn tail and ricrac collar
Puppy dogs with floppy ears
(those are our dogs Onyx and Yota...really they look just like them!)
Another cat and Bella's version of our dog Onyx
Bella enjoyed chasing us around the house having her puppet bit us, LOL
Happy Crafting!
~Patricia
From crafting to playing, sock puppets provided my kids with hours of fun!
The other day I got the usual "Mom we're board...lets do a project!"
I sigh, as I think about all the things I need to get done around the house.
What can the kids make without much help from me??
How about puppets!
This thought started out as paper bag puppets, in my mind.
As I grabbed a stack, Bella said "No Mama, SOCKS"
I can never can find matching socks when we need them...that works perfect for this craft!
My other issue with socks, is that none of ours "look" clean.
Kids in and out of the house all day, more often than not the kids are shoeless and socks (if they are wearing them LOL) get worn outside.
What's the deal with that??
I remembered a sock puppet a teacher had that had a "hard mouth".
Problem Solved...More on that later
While the kids looked for socks, I got out glue (regular & hot glue), markers, fabric scraps, felt, cotton balls, ribbon and google eyes.
With the kids hard at work on traditional sock puppets, I worked on my new version.
How to get rid of the dirty bottom on the sock ;) and make a better puppet
Using a cereal box I cut out an oval approx. 2.5 by 4 inches
(this worked well on an adult sock)
Depending on the size of your sock you may need to adjust the size.
Put your hand in, with fingers on top and thumb on the bottom of the cardboard, test out the mouth to make sure it is where you want it.
Now, cut a smaller oval in the sock, where you want the mouth.
Glue the cardboard to the inside of the sock.
I used hot glue so it would dry faster but any glue will work.
cut out another oval from fabric or paper and glue it on top.
Check it out, looks awesome, right?
Sheep (using cotton balls for the woolly fur)
(those are our dogs Onyx and Yota...really they look just like them!)
~Patricia
Labels:
Kid Crafts,
Tutorials/Printables
Friday, February 6, 2009
Be Still my Beating Heart
We've gone heart crazy in preparation for valentines day.
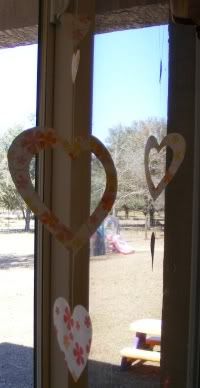
Faux Stained Glass Hearts.
*Warning this can be a messy project
Materials:
2 sheets Wax Paper, Glue, Water, Tissue Paper,
embellishments to decorate your heart (optional)
Start by mixing equal parts water and glue, tear/cut up tissue paper, you can draw shapes on the wax paper at guides.
Dip the tissue paper in the glue mixture and lay in desired location on the wax paper.
When you are done place the 2nd wax sheet on top, so the tissue paper is sandwiched in between the layers.
Let dry 24hrs (depending on how much glue your little one uses)
Cut out the shapes when dry.
Hang them around the house or attach them to cards to give as valentines


Next up
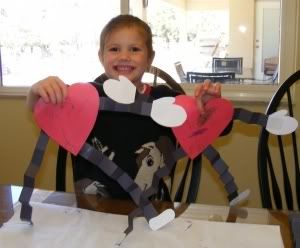
Wiggly Arm Hearts
This one is super easy!
Trace & cut out a heart shape
Decorate the heart
Cut strips of paper for the arms and legs
Accordion fold the strips
Glue the arms and legs to the heart
Cut out Shapes for hands and feet
Glue them to the arms and legs
You're done :)
Heart Mobiles
I downloaded scrap booking paper images from Tricia-Rennea Art
Traced heart shapes in different sizes
Cut & Hang for a Fun decoration
Be Mine Heart Garland
I made this in Word, Printed it, Cut it and strung on ribbon
I'd love to share the document but I can't figure out how to post a pdf file in my blog
If I ever do I'll post it or you can email me for it.
*Revised*
Here's a download to the
Be Mine Garland

I stitched up a felt conversation heart while watching TV and I forgot to stuff it!
Still looks cute ;)

hmmm, who should I give it too??
~Patricia
Faux Stained Glass Hearts.
*Warning this can be a messy project
Materials:
2 sheets Wax Paper, Glue, Water, Tissue Paper,
embellishments to decorate your heart (optional)
Start by mixing equal parts water and glue, tear/cut up tissue paper, you can draw shapes on the wax paper at guides.
Dip the tissue paper in the glue mixture and lay in desired location on the wax paper.
When you are done place the 2nd wax sheet on top, so the tissue paper is sandwiched in between the layers.
Let dry 24hrs (depending on how much glue your little one uses)
Cut out the shapes when dry.
Hang them around the house or attach them to cards to give as valentines
Next up
Wiggly Arm Hearts
This one is super easy!
Trace & cut out a heart shape
Decorate the heart
Cut strips of paper for the arms and legs
Accordion fold the strips
Glue the arms and legs to the heart
Cut out Shapes for hands and feet
Glue them to the arms and legs
You're done :)
I downloaded scrap booking paper images from Tricia-Rennea Art
Traced heart shapes in different sizes
Cut & Hang for a Fun decoration
I made this in Word, Printed it, Cut it and strung on ribbon
I'd love to share the document but I can't figure out how to post a pdf file in my blog
If I ever do I'll post it or you can email me for it.
*Revised*
Here's a download to the
Be Mine Garland
I stitched up a felt conversation heart while watching TV and I forgot to stuff it!
Still looks cute ;)
hmmm, who should I give it too??
~Patricia
Labels:
Felt Crafts,
Holidays,
Kid Crafts,
Stitchery,
Tutorials/Printables
Wednesday, February 4, 2009
Kids Artist Trading Card Swap
Click on over to House on Hill Road to sign your child up for a
Artist Trading Card Swap.
As you know my kids love to draw and paint, they also love to get mail.
In this Swap the kids will be grouped with 5 other children of the same age.
Each child will create 5 Artist Trading cards of their own and mail them to their partners.
In return your child will receive 1 card from each of the children in their group.
I know, sounds confusing when I explain it.
Here are some of the details from the House on Hill Road blog
- Please send a message to atckidswap@gmail.com by this Friday, 2/6. Let us know your address, your child's name and age. International swappers are welcome!
- This is exclusively a project for children and for that reason, we are specifying that participating children be ages 4 and up. No adult ATC's, please.
- We will divide the children into groups of 6, meaning your child will make 5 cards to mail out. You will receive your group from us on Monday, 2/9.
- Artist trading cards are all the same size: 2.5" by 3.5". Because ATC's are so small, they will fit into a standard envelope. To keep it simple, the participants are not obligated beyond mailing the actual card out to its recipient (plus any information about the card they'd like to add). Anything extra is up to the sender and is not expected or required.
- Finished cards should be mailed out to their recipients no later than 2/28.
If your interested visit their blog for additional details and to learn exactly what an Artist Trading Card is. Don't forget to email them by Friday February 6th to sign up!
~Patricia
Labels:
Contests/Promos/Deals,
Kid Crafts
Sunday, January 25, 2009
Weekend Projects
Here's an educational and fun craft to keep kids occupied.
Woodcraft Construction Kits
Trenton spent the weekend making a Stag Beetle and a Bumblebee to add to his collection of wood models.
I was impressed how well he was able to follow the numbered diagram to put them together.
Just a few months back he need more assistance with the car and jet.

It's amazing to see how quickly a child's mind can grow :)
~Patricia
Woodcraft Construction Kits
Trenton spent the weekend making a Stag Beetle and a Bumblebee to add to his collection of wood models.
Just a few months back he need more assistance with the car and jet.
It's amazing to see how quickly a child's mind can grow :)
~Patricia
Labels:
Kid Crafts,
My Family
Monday, January 19, 2009
Paint your own Canvas Wall Art
There was no school today.
In my home that means I will have 2 children looking for something to craft.
Trenton & Isabella both received "Paint Your Own Monogramed Canvas Wall Art" kits for Christmas.
They've asked several times to work on these but I knew this was a project that would take up an entire day.
And that's just what I needed today :)
The kit comes with everything you need to complete the project.
From the booklet provided you choose the background style and the font for your initial.
Using carbon paper you trace the design onto the canvas and your ready to paint.
The set comes with 5 basic colors and a mixing chart.
Do you hear it?
That's the sound of quiet childrenStill Hard at work
Happy children with a beautiful completed master piece to hang on their bedroom walls
Where are they now?
Outside playing basketball with Dad
Where's Mom?
Relaxing at the computer reflecting on a successful day off from school
~Patricia
Labels:
Kid Crafts,
My Family
Monday, December 8, 2008
Christmas Trees and Pom poms
Make your own Christmas Tree
I have been eyeing these porch/entryway Christmas trees that I have been seeing at stores, for a while.
I've seen them in many sizes, with or without decorations and typically they range in price from $30-100.00+
I don't have much of a budget for holiday decorations this year, so I made my own.
I started with an empty flower pot and a tomato cage.
You can place the tomato cage upside down over the pot, like I did below
or if your pot is large enough you can place it in it
I used 3 9ft sections on 2ply pine garland that can be purchased for $3.99 each.
Wrap each section of garland around the tree and position the branches to fill in the empty spaces. It won't cover perfectly but trust me it will look fantastic when your done.
After the pine garland was in place, I wrapped a string of white lights around it and Bella added the faux poinsettia to make the tree look festive during the day.
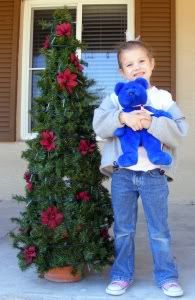
The tree looked awesome all lit up tonight.
After I make another I will post more pictures.

While at a holiday home tour I saw similar trees wrapped in moss and decorated with fruit.
One used only green apples, it looked beautiful.
Pompoms
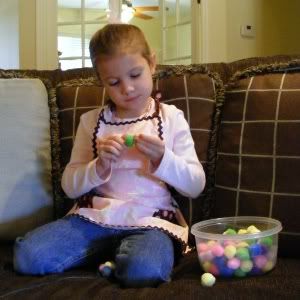
Bella has jumped on the Pom pom Garland craze.
This was an easy craft that she really enjoyed
She loved the fact that she could do it all by herself and it didn't take long.
Looks great on her and
on her very own Christmas tree!
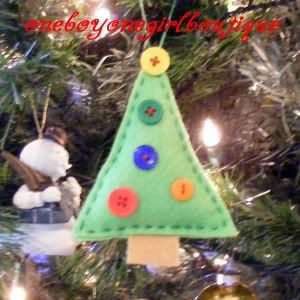
Felt Ornaments
Here's a sneak peak at a felt ornament I made
I am working on a couple other designs based on cookie cutter shapes.
When I'm done I will post my patterns so you can make your own.
Happy Decorating!
~Patricia
I have been eyeing these porch/entryway Christmas trees that I have been seeing at stores, for a while.
I've seen them in many sizes, with or without decorations and typically they range in price from $30-100.00+
I don't have much of a budget for holiday decorations this year, so I made my own.
You can place the tomato cage upside down over the pot, like I did below
Wrap each section of garland around the tree and position the branches to fill in the empty spaces. It won't cover perfectly but trust me it will look fantastic when your done.
The tree looked awesome all lit up tonight.
After I make another I will post more pictures.
While at a holiday home tour I saw similar trees wrapped in moss and decorated with fruit.
One used only green apples, it looked beautiful.
Pompoms
Bella has jumped on the Pom pom Garland craze.
This was an easy craft that she really enjoyed
Here's a sneak peak at a felt ornament I made
When I'm done I will post my patterns so you can make your own.
Happy Decorating!
~Patricia
Tuesday, December 2, 2008
Ornament Crafts
While decorating the Christmas tree this past weekend I came across ornaments we have made over the years that are great kid crafting projects.
The first 2 are pipe cleaner ornaments.
Here's an easy candy cane that kids of all ages can make. We have them in several colors and sizes on the tree.
The snowflake may be better suited for older kids or the help from mom or dad to cut small pieces of pipe cleaners.
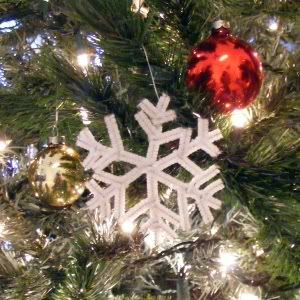
We had also made a wreath but I can't find it. If I make a new one I'll post a pic.
Trenton (10) and I made adorable reindeer ornaments when he was 3.
What a nice memory on our tree, we even have mommy and daddy reindeer hands...I think it's time Isabella made one ;)
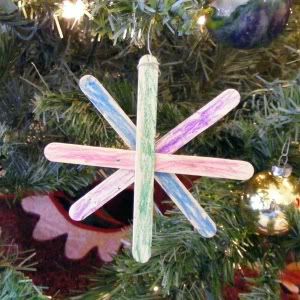
Isabella did make this Popsicle ornament, there are also a few decorated with sparkles.
I made this gingerbread man garland several years ago along with a snowman set for my sister.

Here's the recipe for the garland
3 cups all purpose flour
1 cup salt
1 cup water
Decorations:
Food Coloring, Glitter or Acrylic Paints
To make the dough, combine the flour, salt, and water in a mixing bowl.
Knead the dough until smooth and rubbery.
You can roll out the dough and use cookie cutters to make your shapes.
If you will be making the shapes for garland use a straw to make holes for the ribbon.
Bake at 275 degrees for 1 hour.
Paint the ornaments after they have cooled completely.
Happy Christmas Crafting!
~Patricia
The first 2 are pipe cleaner ornaments.
Here's an easy candy cane that kids of all ages can make. We have them in several colors and sizes on the tree.
We had also made a wreath but I can't find it. If I make a new one I'll post a pic.
What a nice memory on our tree, we even have mommy and daddy reindeer hands...I think it's time Isabella made one ;)
Here's the recipe for the garland
3 cups all purpose flour
1 cup salt
1 cup water
Decorations:
Food Coloring, Glitter or Acrylic Paints
To make the dough, combine the flour, salt, and water in a mixing bowl.
Knead the dough until smooth and rubbery.
You can roll out the dough and use cookie cutters to make your shapes.
If you will be making the shapes for garland use a straw to make holes for the ribbon.
Bake at 275 degrees for 1 hour.
Paint the ornaments after they have cooled completely.
Happy Christmas Crafting!
~Patricia
Labels:
Crafty Creations,
Holidays,
Kid Crafts,
Tutorials/Printables
Sunday, November 23, 2008
Stitching & More
While I was working on my "Where we Love is Home" project, I taught the kids the stitches I had learned in the eBook.
Trenton is 10 so he picked it up quick.
Although Isabella is only 4 she was able to handle the basic stitches on her own and only needed a little more direction for the others.
While searching for the kids stitching pictures I came across a couple other projects they worked on recently that would make great gifts for kids to make for the upcoming holidays.
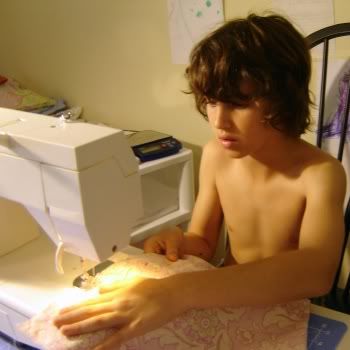
One of Trenton's favorite projects is making pillows.
He's made them for teachers, grandparents, himself and to sell at craft fairs.
He raids my fabric stash and creates pillows in all different sizes.
No pattern needed for an easy sewing project like this.
Here's a proud grandma receiving a pillow for mother's day
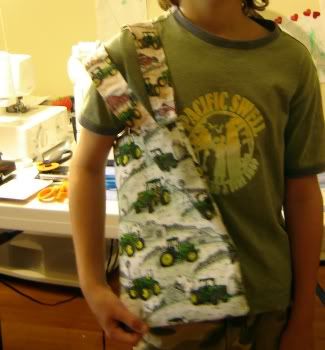
Trenton has also made his own tote bags, perfect to take on trips to carry books or his NintendoDS
This one is reversible
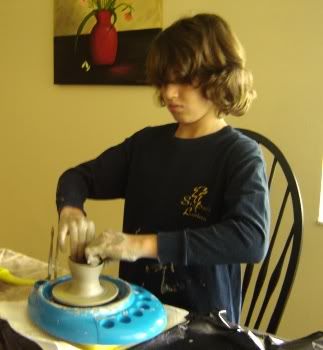
He also made his first piece of pottery over the summer.
This is still a work in progress because he hasn't painted it yet.

Isabella is the Queen of Jewels!
She will spend hours beading necklaces and bracelets for herself and friends.

Trenton is 10 so he picked it up quick.
One of Trenton's favorite projects is making pillows.
He's made them for teachers, grandparents, himself and to sell at craft fairs.
He raids my fabric stash and creates pillows in all different sizes.
No pattern needed for an easy sewing project like this.
He also made his first piece of pottery over the summer.
This is still a work in progress because he hasn't painted it yet.
Isabella is the Queen of Jewels!
She will spend hours beading necklaces and bracelets for herself and friends.
Labels:
Kid Crafts,
Sewing,
Stitchery
Subscribe to:
Posts (Atom)